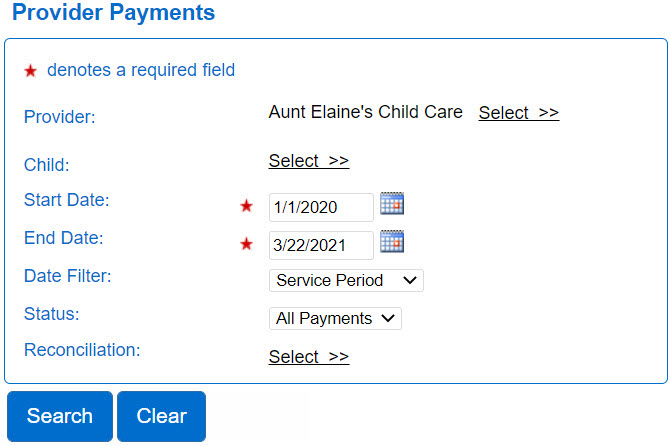
Provider > Payments
Use the Provider > Payments page to review the details of all payments issued to a Provider during the selected time period which include a list of the children and the amount and fees paid.
- Select the Provider activity from the Navigation Bar.
- Open the Payments page. Depending on your Operator type or previous selection, the Provider field may be populated. If not, press Select >> to enter the criteria to search for a Provider. The more criteria you add, the more specific the results of your search will be.
- Press Search.
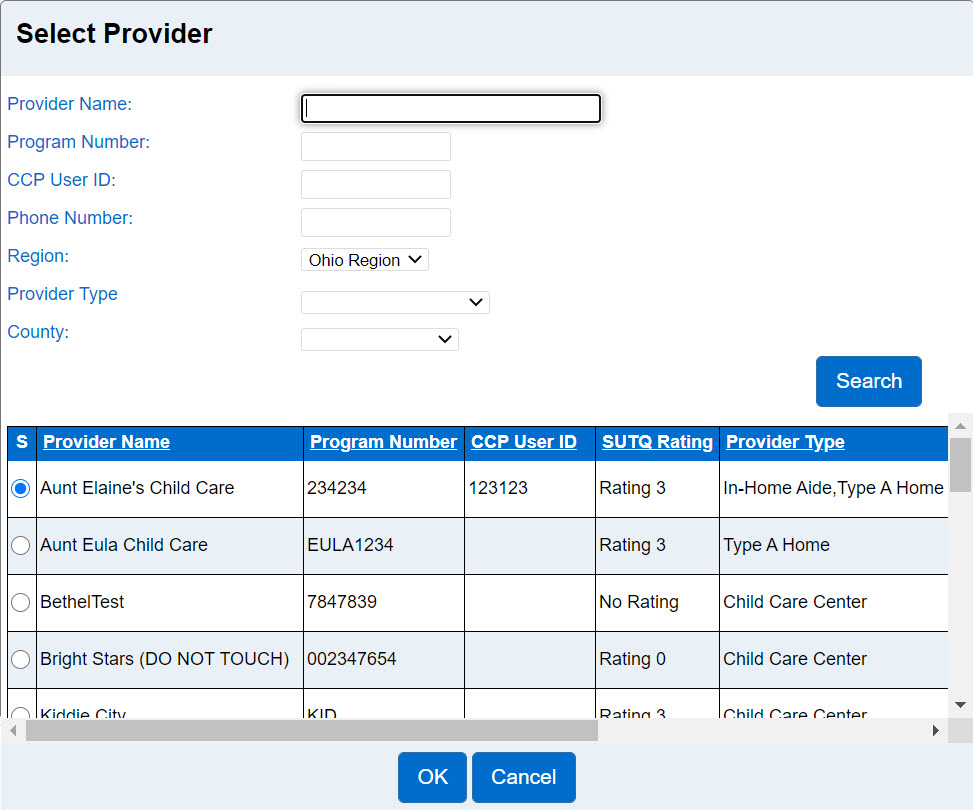
- Click on the corresponding radio button to select a Provider, then press OK.
- Press Select >> to enter the desired criteria to search for the name of the Child to whom the payment corresponds.
- Select the Start Date and the End Date range by typing the dates in the corresponding fields or use the Calendar button.
- Use the next three fields too narrow the Search Results. Press the drop-down arrow and select the desired Date Filter to indicate whether you would like Start Date and End Date to apply to the Service Period, Settlement Date, or Processed Date to the Payments.
- Press the drop-down arrow to select the Payments Status you would like to include, whether All Payments, Processing, Paid, or Rejected.
- Press Select >> to choose which Reconciliation type you would like to include. You can also click on the Select All checkbox to select Reconciliation types. Click again to deselect.
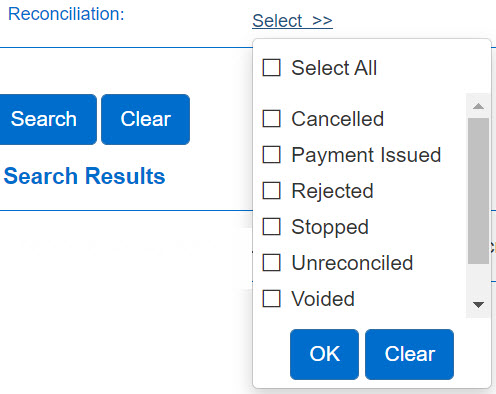
- Cancelled - Warrant has been cancelled and a new issuance will be generated.
- Payment Issued - Payment deposited within 2-4 days.
- Rejected - Banking information error and a new issuance will be generated.
- Stopped - Warrant has been stopped and a new issuance will be generated.
- Unreconciled - Warrant has been issued and mailed but not yet deposited.
- Voided - Payment error has occurred, and a new issuance will be generated.
- Waiting - Payment deposited within 5-7 business days.
- Press Search.
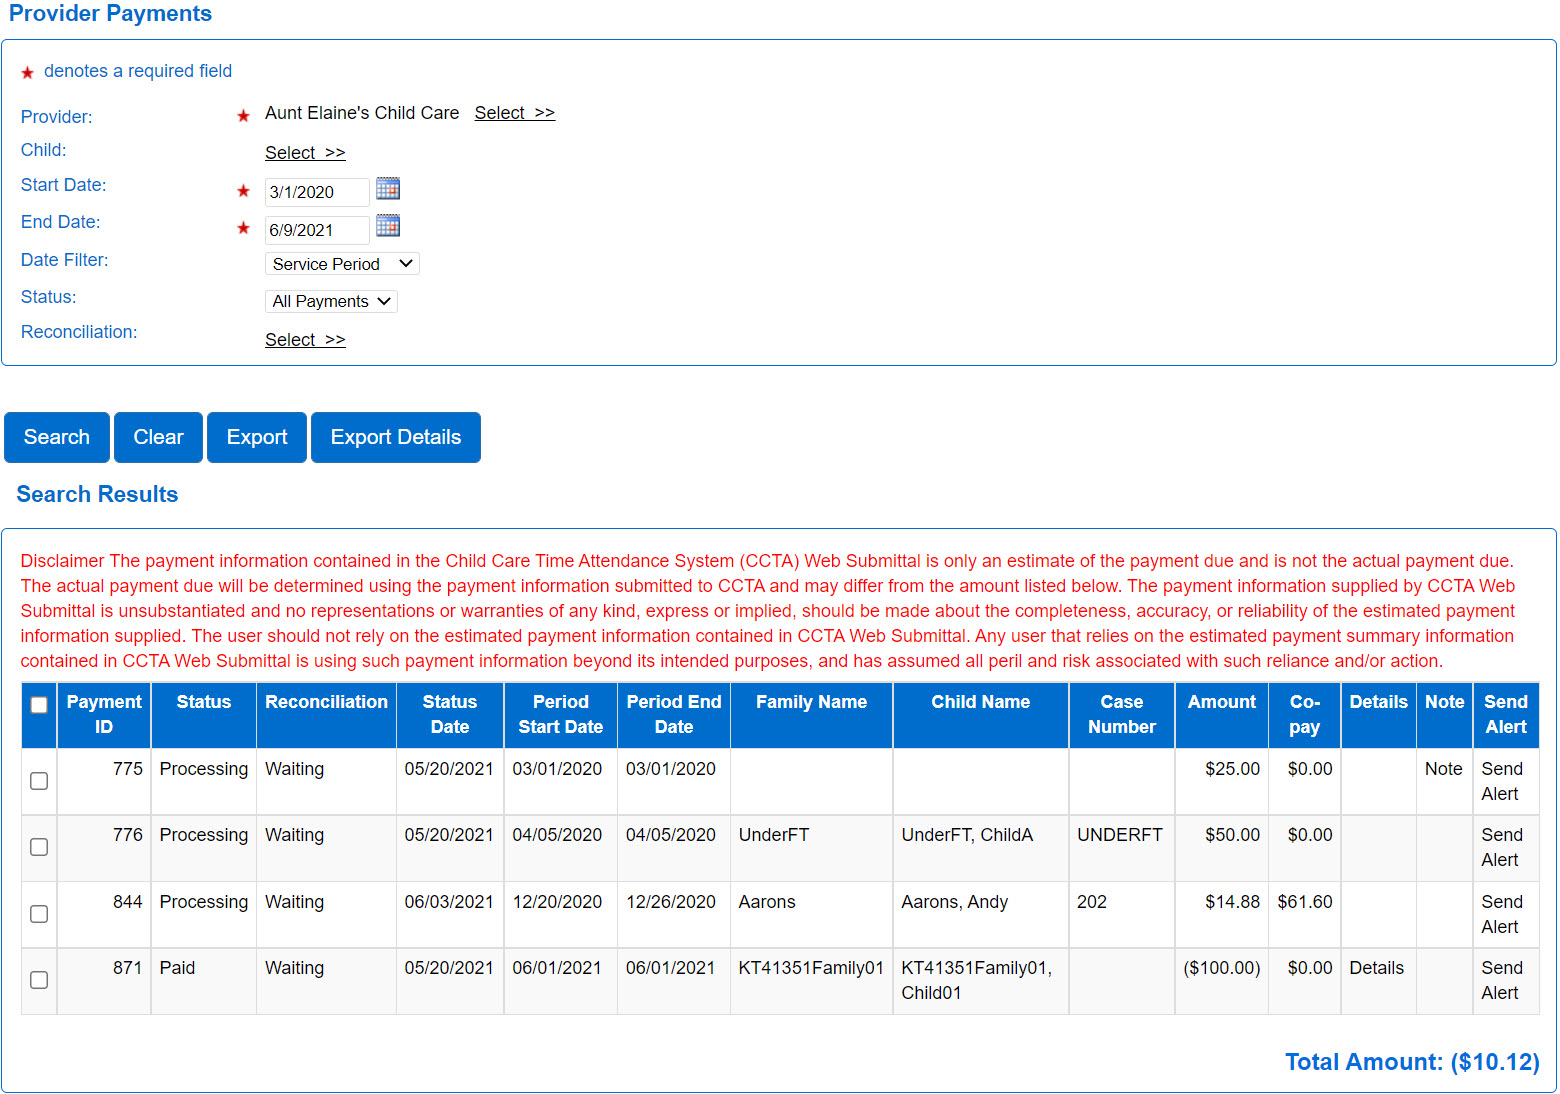
- It is possible to Export all or part of the Provider Payments Search Results. The system exports the payment records in CSV format. Select the payments to be included by clicking on the check box next to the desired Payment ID(s) or click on the check box located on the title ribbon to select all.
- To export a more detailed CSV for a Provider Payment, press Export Details. Select the payments to be included by clicking on the check box next to the desired Payment ID(s) or click on the check box located on the title ribbon to select all.
- If you have questions about a Paid or Processing status payment, click on the corresponding Send Alert send a message. The Alert will appear in the Message Center, under the Sent tab. For additional information, refer to Message Center.
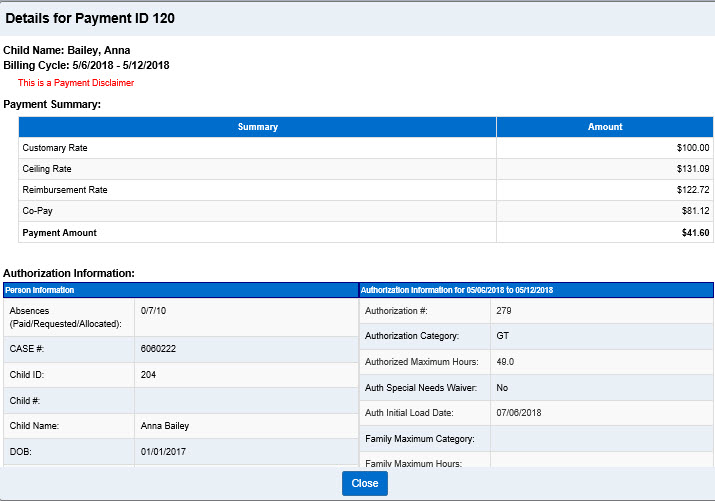
- To review the details of a payment, if the Payment Status is Paid, click on the corresponding Details. Note that this option is only available after processing is complete and status is Paid.
- Use the scroll bar on the right of the table to move through the list of items in the page.
- Press Close to return to the Search Results.