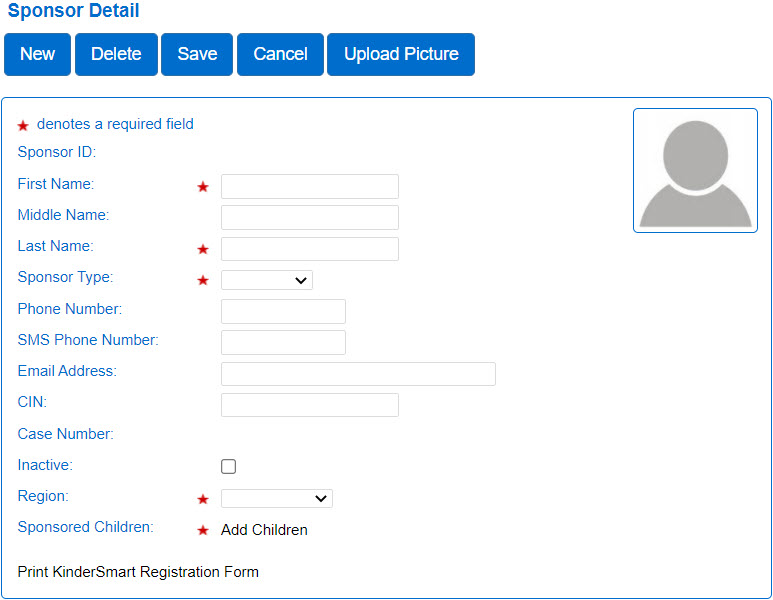
| Field | Description |
|---|---|
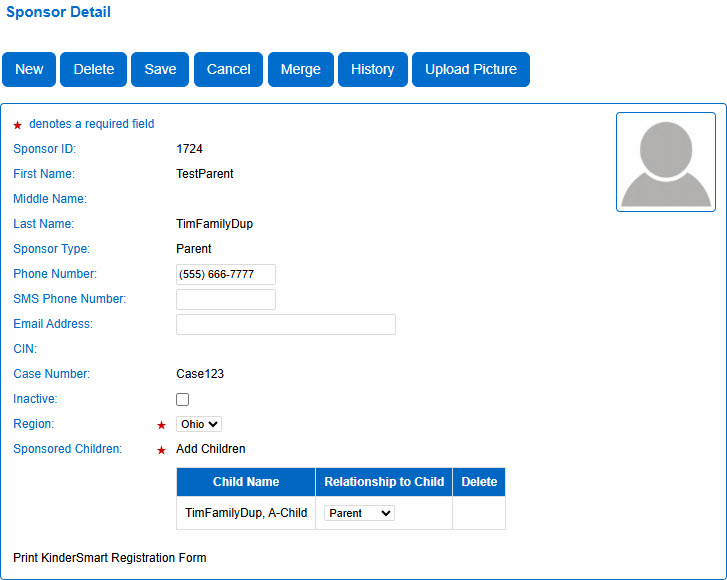
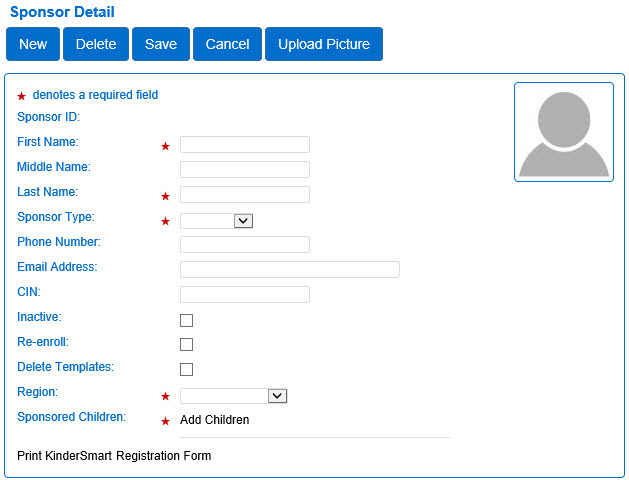
| Sponsor ID | Displays the unique Sponsor ID number that the system generates. |
| First Name Middle Name Last Name |
Displays the Sponsor Last Name, First Name, and Middle Initial. |
| Sponsor Type |
Displays the Type of Sponsor. Press the drop-down arrow to see the available types. Note: This is a required field.
|
| Phone Number | Displays the telephone number of the Sponsor. |
| SMS Phone Number | Displays the SMS telephone for the Sponsor used to unlock their account if they have verified their number through KinderSign. |
| Email Address | Displays the email address of the Sponsor. |
| CIN | Displays the Identification Number used to link the Sponsor to another system that interfaces with KinderConnect. Note: The CIN field is only enabled for Private Pay sponsors. |
| Case Number | Displays the case number of the Sponsor. |
| Inactive | Checking this box indicates that the Sponsor is currently inactive. |
|
|
Displays the |
| Sponsored Children |
Displays the names of all Children assigned to this Sponsor. To add a child(ren) to a Sponsor record,
Note: This is a required field. |
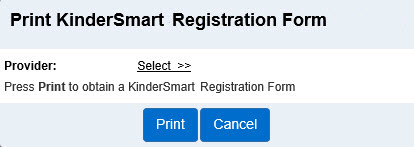
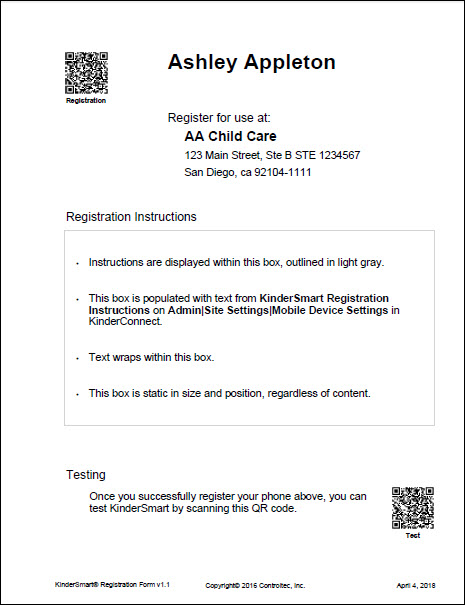
| Print KinderSmart Registration Form |
Press this link to open the KinderSmart Registration Form which the Provider will print and display for Sponsors to scan when checking children in or out.
|